Why a ski rack matters (and what “best” really means)
“Best” isn’t one-size-fits-all. If you’ve got a tight garage, a rental, or a growing quiver, the right rack should do three things well:
-
protect skis from rust, scratches, and warping,
-
make grab-and-go simple, and
-
use space intelligently.
Below is a clear-eyed look at the main rack types—what they’re good at, where they stumble—and where Gravity Grabber fits in.
The main ski rack options
1) Wall-mounted racks
What they are: Hardware that secures skis vertically or horizontally to a wall.
Why they work: They free up floor space, keep bases and edges off damp concrete, and reduce tip-over risk.
Watchouts: You’ll want to hit studs and avoid mounting too low (splash zone) or too tight (edge scuffing).
Best for: Most garages and gear rooms; anyone who wants tidy, everyday access.
2) Freestanding floor racks
What they are: Standalone frames with slots or cradles.
Why they work: No drilling—good for renters and flexible layouts.
Watchouts: They consume floor space and can still invite bumps or tip-overs if loaded unevenly.
Best for: Rentals, temporary setups, or wide open spaces where floor area isn’t precious.
3) Ceiling/overhead systems
What they are: Lifts, hooks, or rails that suspend skis overhead.
Why they work: Fantastic for off-season storage and maximizing vertical space.
Watchouts: Not ideal for weekly use; ladders and hoists slow down access. Moisture near garage doors still matters.
Best for: Long-term/seasonal storage or when wall space is maxed out.
4) DIY builds (wood, PVC, slatwall hybrids)
What they are: Home-built brackets or slots, often paired with foam/pad protection.
Why they work: Cheap, customizable, and satisfying if you like projects.
Watchouts: Protection is easy to under-engineer (no padding, sharp edges), and mistakes can compress camber or scratch topsheets.
Best for: Budget, custom dimensions, and tinkerers who will pad and finish properly.
What to look for—regardless of type
-
Edge/base protection: Soft or non-marking contact points; nothing that compresses edges together.
-
Elevation & airflow: Off the floor to avoid moisture; space for air circulation to dry meltwater.
-
Separation: Skis shouldn’t grind against each other or other gear.
-
Ease of use: If it’s fiddly (straps, clamps, ladders), you’ll skip it when you’re tired—habits beat intentions.
-
Scalability: Families and quivers grow; modular or repeatable mounts future-proof the setup.
-
Seasonal flexibility: Ideal if the same system can pivot to warm-weather gear.
What is Gravity Grabber, exactly?
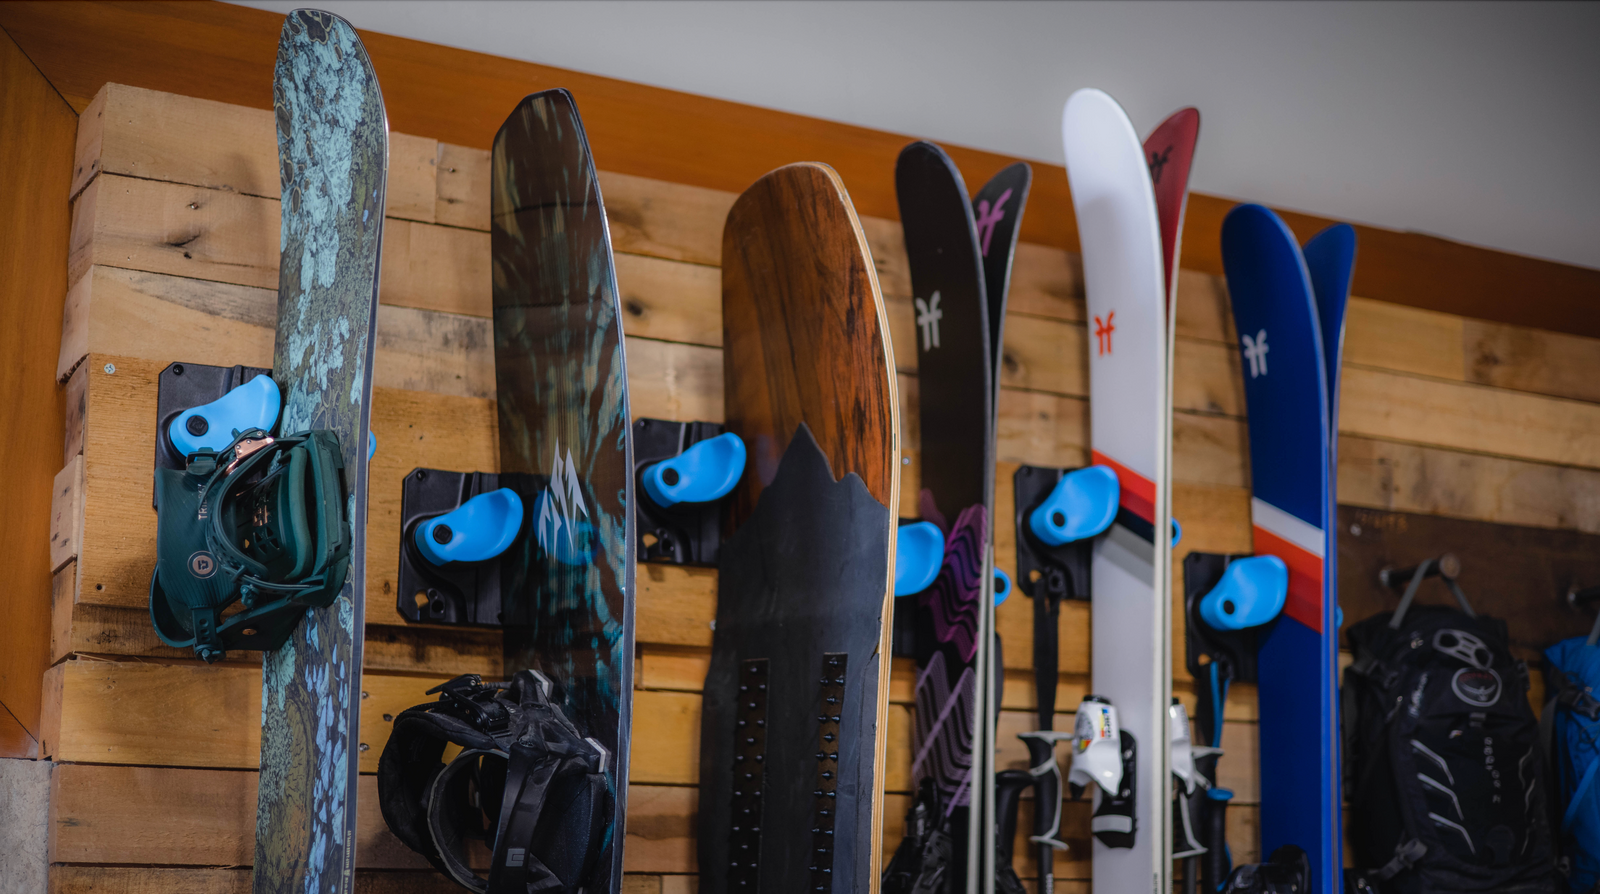
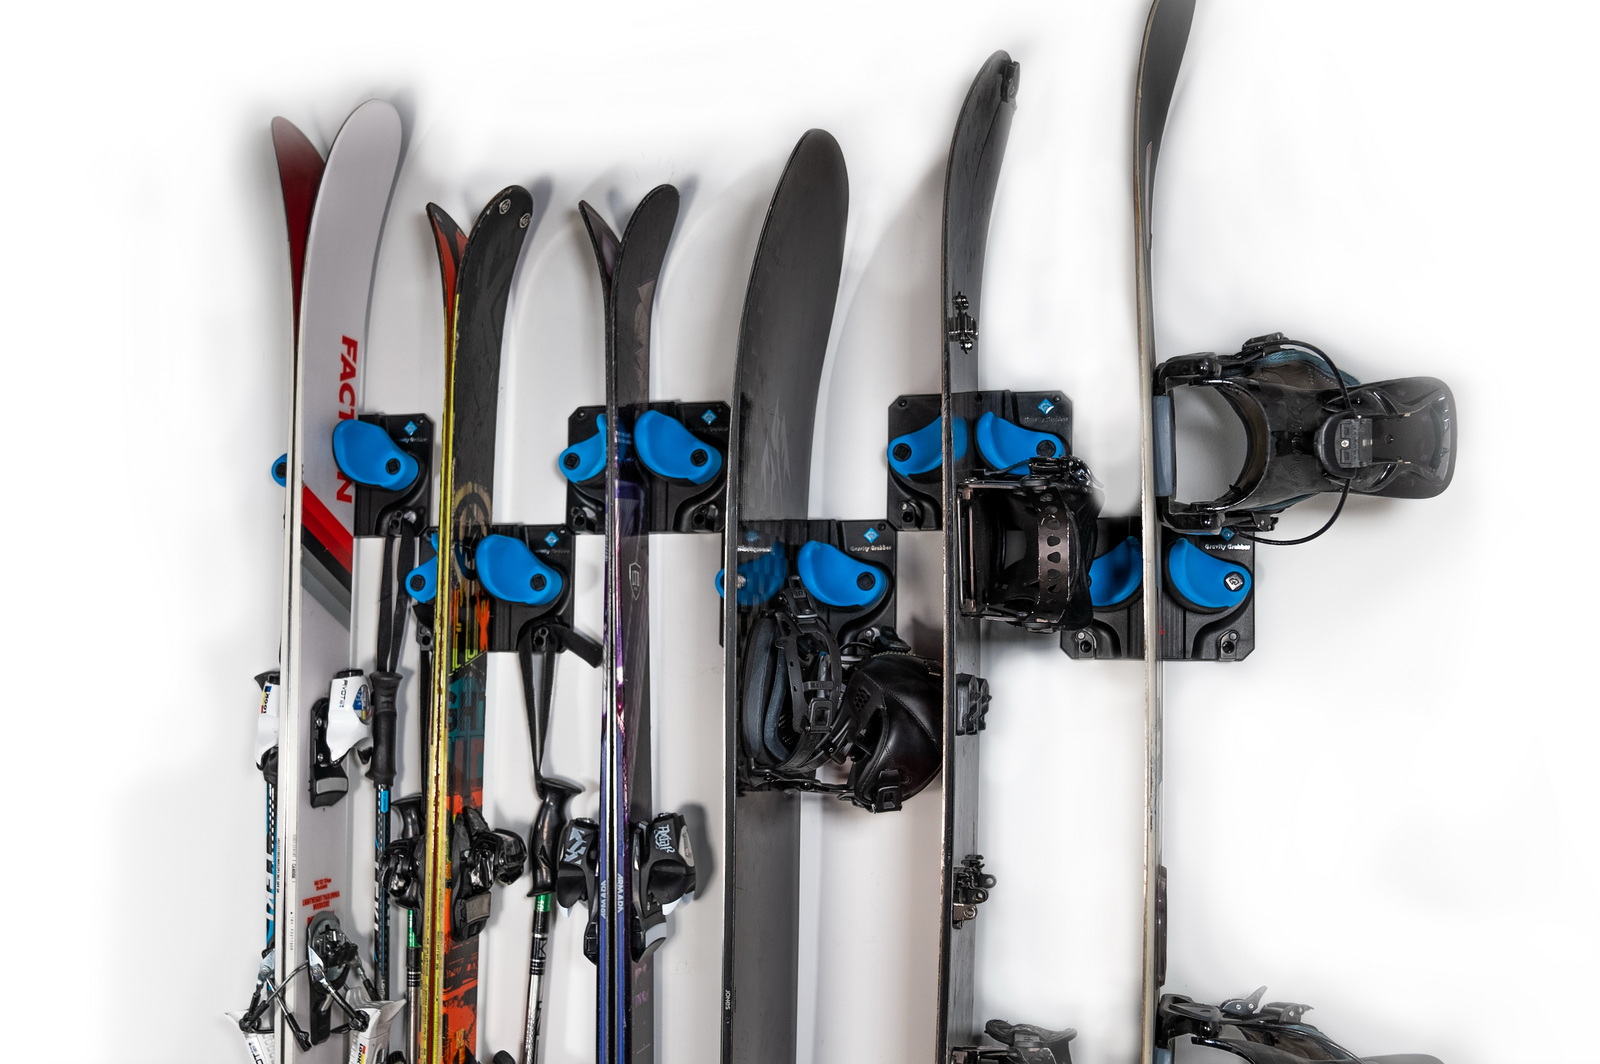
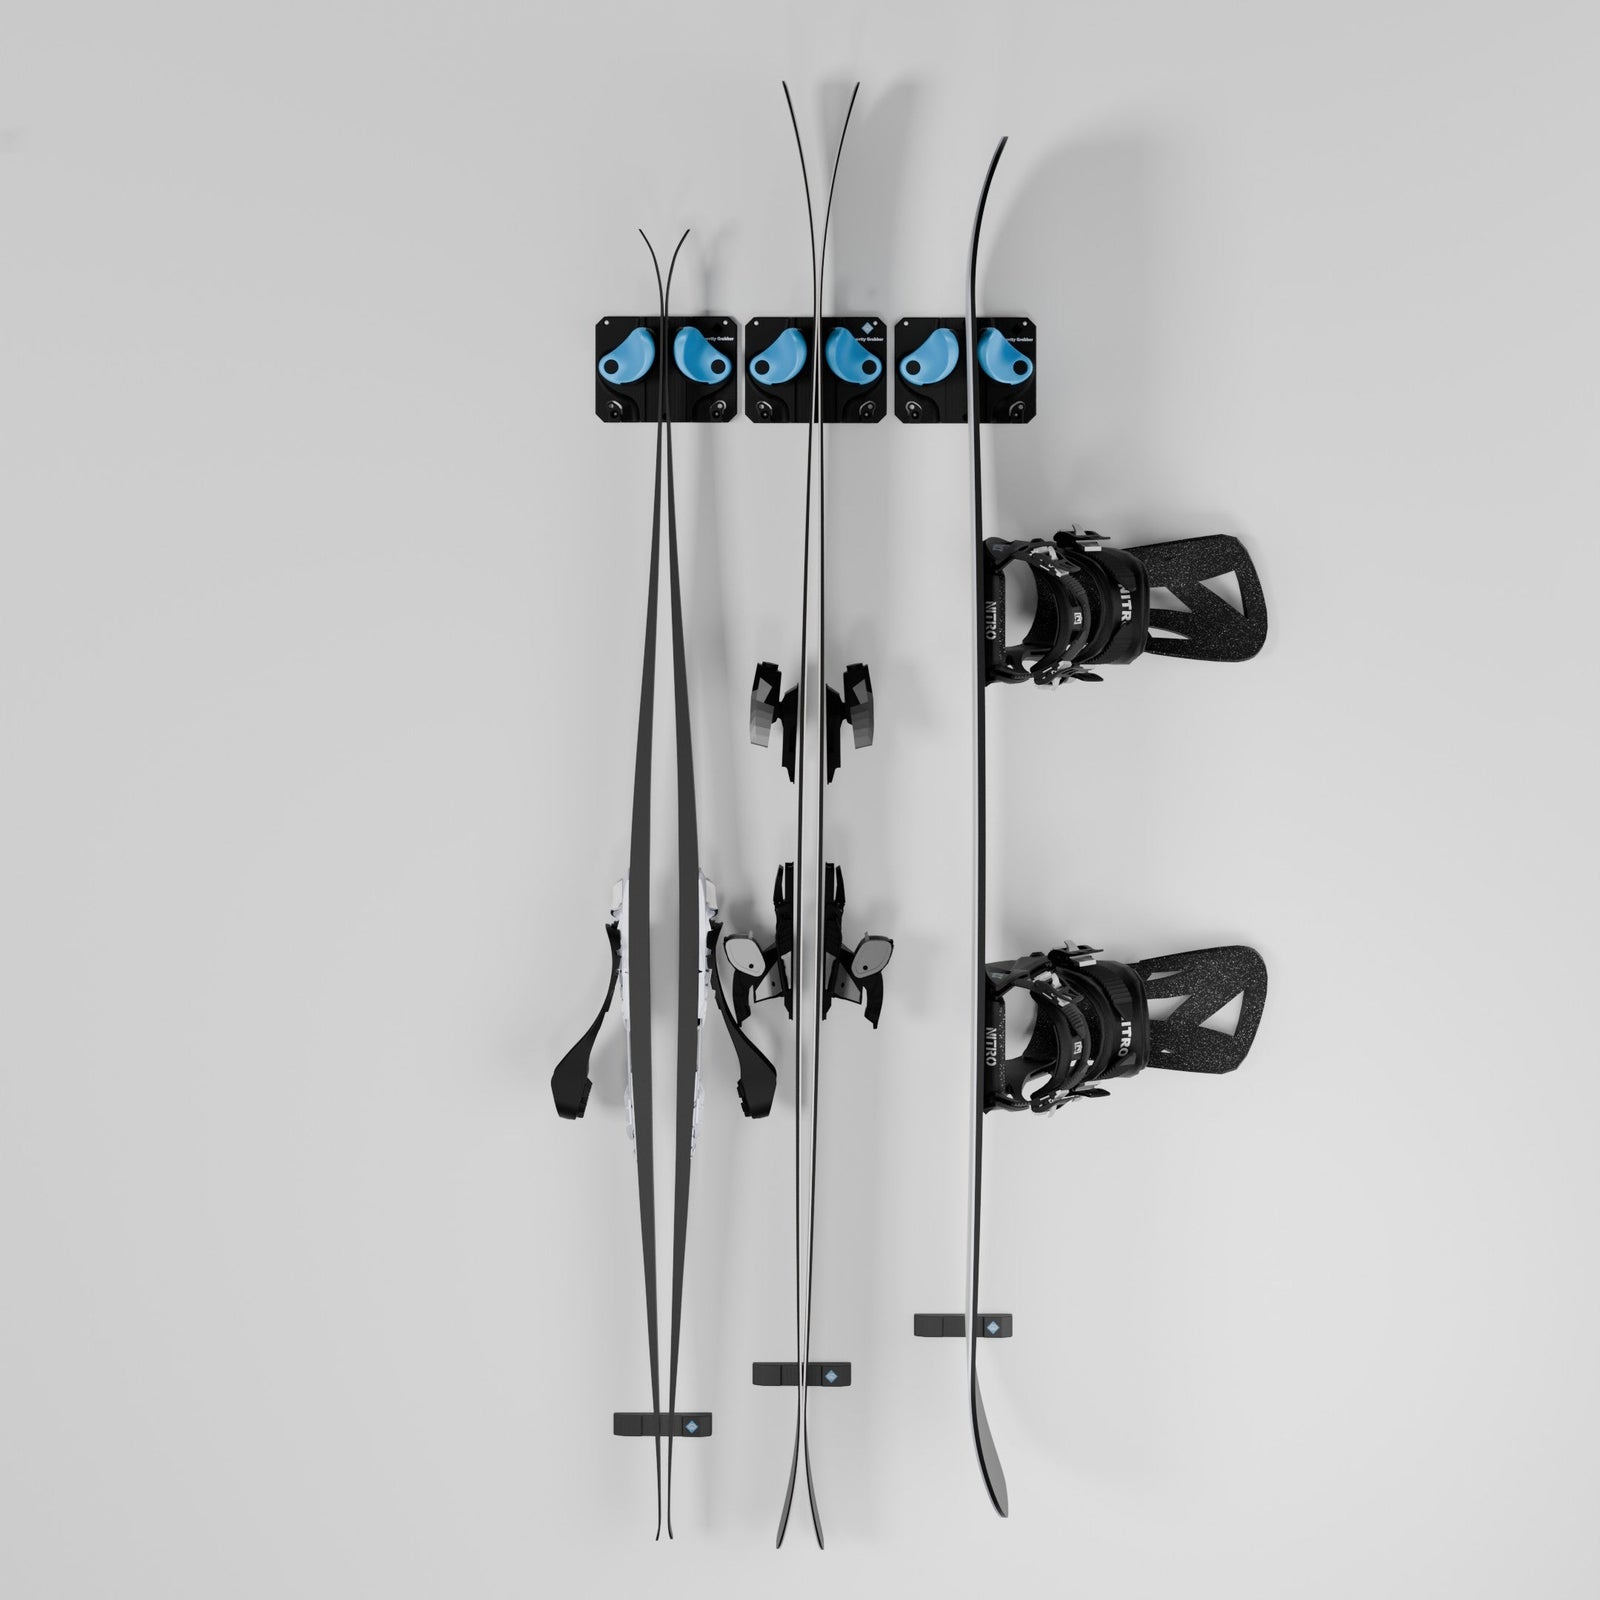
Gravity Grabber is a compact, wall-mounted storage system with padded, non-marring arms that cradle skis (or a snowboard) vertically. Instead of clamping hard on edges or relying on a one-angle hook, its grip is designed to hold securely without pressure points. Practically, that means:
-
Off-the-ground storage: Skis avoid damp floors—less rust, less grit.
-
Gentle, protective contact: Padded arms help prevent topsheet scuffs and edge dings common with bare metal hooks.
-
Separation by design: Each unit houses a pair (or board) so gear doesn’t knock together.
-
Fast in/out: Slide, done. No straps or clamps—good habits become automatic.
-
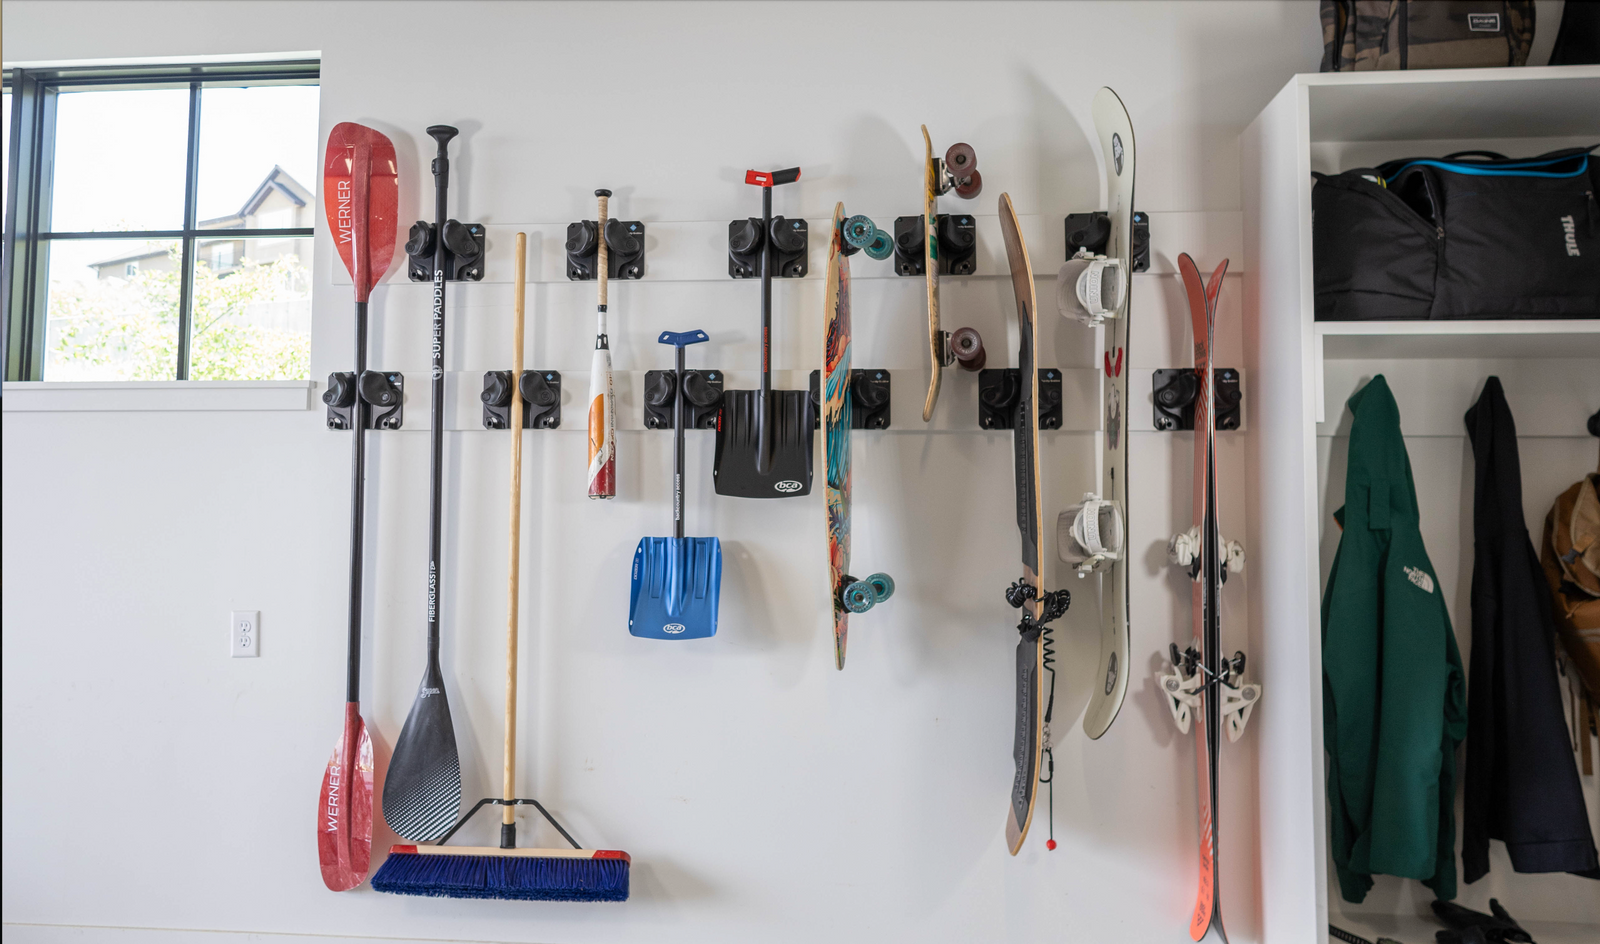
Multi-season utility: In winter it holds skis/boards; in summer it pivots to rakes, shovels, paddles, lacrosse sticks, pickleball paddles, fishing nets, and similar long gear.
-
Small footprint: Uses wall height in tight garages, mudrooms, apartments.
How it compares to other options
-
vs. basic wall hooks/brackets: Hooks are cheap but can chip topsheets, pinch edges, or let skis slide. Gravity Grabber’s padded arms and geometry focus on non-damaging contact and secure hold.
-
vs. freestanding racks: Freestanding avoids drilling, but it costs floor space and can still tip. Gravity Grabber trades zero floor space for a stud mount; stability is excellent once installed.
-
vs. ceiling racks: Overhead storage wins for off-season volume, loses for weekly access. Gravity Grabber is the opposite—ideal for daily/weekly use, still fine year-round.
-
vs. DIY: A great DIY can match function, but you must engineer padding, spacing, and angles correctly. Gravity Grabber gives you that protection and spacing out of the box.
Where Gravity Grabber is not perfect
-
Renters / no-drill policies: You’ll need permission or alternative anchors; otherwise consider freestanding.
-
High-volume quivers: A single unit holds one pair/board—families will want a tidy row of units (which is still space-efficient).
-
Truly wet bays: If your wall sits in a frequent splash zone, mount higher and manage meltwater with trays or mats.
Choosing the right setup (quick guide)
-
Small garage / want daily convenience: Wall-mounted (Gravity Grabber row) + a boot/helmet shelf above or beside.
-
Rental / no drilling: Freestanding rack now; plan a wall system when you have permission.
-
Off-season bulk: Ceiling storage for retired gear, wall mounts for what stays active.
-
Family gear wall: Repeatable wall units in a single lane; label names/sizes for speed.
-
Four-season garage: Wall mounts that pivot to summer tools (Gravity Grabber) so one lane works year-round.
Bottom line
There’s no universal “best” rack—there’s the best-for-your-space-and-habits. If your goals are protecting edges and bases, speeding up exits, and freeing floor space, a wall-mounted system is hard to beat. Among those, Gravity Grabber distinguishes itself with gentle, secure contact, quick access (no clamps), and rare multi-season versatility—it doesn’t become dead weight when ski season ends.
Pick the style that fits your constraints, then install it in a way that reinforces good habits. That’s how gear stays sharp, garages stay usable, and ski days start smooth.


